

If you’re a Thunder Bay homeowner thinking about epoxy flooring for your garage, basement, or workshop, you’ve probably seen wildly different prices online, from under $2 per square foot to over $12. The truth? Both can be “right,” depending on what’s actually included. After installing multiple epoxy systems myself in local homes, I’ve learned that the real cost isn’t just the product, it’s the preparation, the climate considerations, and knowing when a DIY kit makes sense versus when you need a professional-grade system.
In this post, I’ll break down real pricing I’ve seen and paid in Thunder Bay, share two actual project case studies (including what went right, what cost more than expected, and how the floors are holding up after several Canadian winters), and bust five common myths that lead homeowners to overspend, or worse, end up with a peeling floor. My goal isn’t to sell you anything. It’s to help you understand what you’re really paying for so you can make a smart decision, whether you roll it on yourself or hire someone.
Real Epoxy Flooring Costs in Thunder Bay: What I’ve Actually Paid
Pricing epoxy flooring purely by the square foot without context is misleading. In Thunder Bay, your final cost depends heavily on the condition of your concrete, the system you choose, and how much prep work is required. Here’s what I’ve seen across residential projects:
- Basic DIY single-coat kits: $1.50–$3.50 CAD per sq. ft. for materials only. These are the big-box store options like Rust-Oleum. They can work well on clean, sound slabs if you’re comfortable doing the prep yourself. Don’t expect commercial durability, but they’re fine for a cosmetic upgrade.
- Better DIY or contractor-grade two-coat systems: $3–$6 per sq. ft. in materials. This includes primer, epoxy, decorative flakes (if desired), and a protective topcoat. You’ll get better solids content, chemical resistance, and build thickness than basic kits, especially if you buy from a specialty supplier rather than a hardware store.
- Professional multi-coat installed systems: $6–$12+ per sq. ft. fully installed for a typical residential garage. This covers diamond grinding, crack repair, moisture assessment, multiple coating stages, flakes or aggregate broadcast, and labour with proper cure times. Difficult floors or premium systems can push this higher.
A key point many homeowners miss: specialty suppliers often cost more upfront than big-box stores, but you’re paying for higher-performance resins, better technical support, and products designed for our climate. Conversely, a rock-bottom quote from a contractor might mean minimal prep, thin film build, or no moisture testing, which is where failures start.
For a typical Thunder Bay garage, I’d budget around $3–$5 per sq. ft. if you’re doing a solid DIY job yourself, and $7–$12+ per sq. ft. for a professionally installed system that’s built to last. If someone’s quoting dramatically less, ask exactly what’s included before assuming it’s a bargain.
Two Real Thunder Bay Projects: Costs, Prep, and How They’ve Held Up
To make this concrete (pun intended), here are two actual projects I’ve worked on in the Thunder Bay area. Both show how preparation drives cost, and longevity.
Detached Garage: 600 Sq. Ft., $5,000 Total (~$8.30/sq. ft.)
This was a 15-year-old detached garage slab with hairline cracks, oil and tire marks, and years of road salt buildup. No major moisture issues, but I still tested because moisture is the silent killer of epoxy floors here.
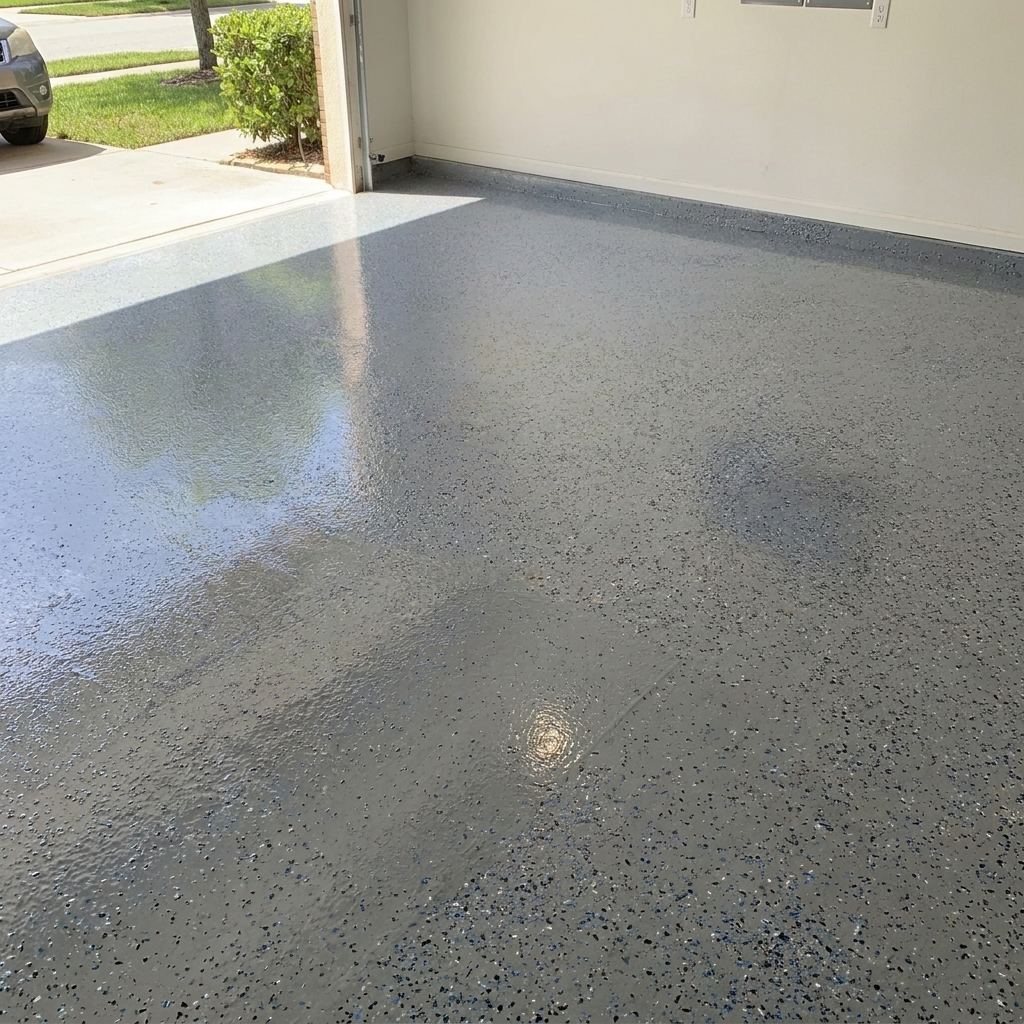
I used a two-coat epoxy system with vinyl flakes and a clear protective topcoat, not a basic hardware store kit, but a higher-build system designed for vehicle traffic and winter abuse. Prep included:
- Diamond grinding the entire surface (not acid etching)
- Thorough vacuuming to remove all dust
- Targeted crack treatment
- Extra time degreasing oil-contaminated areas
Total cost came to approximately $5,000 CAD, including all materials and labour. After several Thunder Bay winters, the floor has held up extremely well. There are minor scuffs from normal use, but no peeling or delamination. The biggest win? Cleaning salt and dirt is now trivial compared to the old bare concrete.
Basement Workshop: 350 Sq. Ft., $3,200 Total (~$9.15/sq. ft.)
This older basement slab had surface dusting, multiple small cracks, and patches of old paint. Prep ended up being a larger percentage of the job than the coating itself:
- Removed all loose existing coating
- Diamond-ground the floor
- Repaired cracks and weak spots
- Full vacuum and primer/base coat
- High-build epoxy with light flake broadcast and clear topcoat
Total cost: about $3,200 CAD for 350 sq. ft. The higher per-square-foot price wasn’t due to materials, it was the intensive prep packed into a smaller space. The floor has performed well despite the slab’s age and character.
The lesson from both projects? You can’t judge an epoxy job by the coating alone. The preparation underneath determines most of the final result, and cost.
Five Epoxy Cost Myths I’ve Seen Lead Homeowners Astray
After working on multiple floors in Thunder Bay, here are five strong opinions I stand by, based on what actually works (and what fails) in our climate.
1. “Cheap kits are fine if you prep properly.” — Only partly true
Good prep can make an inexpensive coating perform much better, but it won’t turn a $200 big-box kit into a commercial-grade floor. Cheap kits often have lower solids, thinner film build, and less chemical resistance. I’m fine with DIY kits for homeowners who understand their limits. The mistake is paying for pro-level prep and labour, then putting an entry-level coating over it. At that point, the coating becomes the weak link.
2. “You absolutely have to diamond-grind.” — Too absolute
I prefer diamond grinding, it gives me a predictable surface profile and removes contamination effectively. But I wouldn’t say acid etching never works. On clean, bare, porous concrete in the right conditions, proper etching can work. The problem? Most garage floors aren’t that clean. Oil, tire residue, old coatings, and years of grime can block etching from working. If I’m quoting a professional job, I favour mechanical prep because I’m paying for a predictable result, not hoping the concrete is clean enough.
3. “Epoxy always peels in Canadian garages.” — False, but moisture is the real enemy
I’ve seen epoxy fail, but blaming Canadian winters is oversimplifying. A properly prepared and installed system holds up very well in Thunder Bay. Where floors fail is moisture coming through the slab, poor prep, contamination, or installing outside the product’s temperature range. Road salt and freeze-thaw cycles are tough, but not an automatic death sentence. If your slab has a moisture problem, putting an expensive coating over it without addressing the issue is just hiding the problem until it fails.
4. “More coats always means a better floor.” — No
There’s a point where adding another coat stops providing meaningful value. A well-designed two- or three-stage system can be extremely durable. Piling on more material doesn’t automatically make it better, and it does mean more cost, more labour, and longer cure times. I’d rather have the right products, correct film thickness, excellent adhesion, and proper curing than five unnecessary coats.
5. “The coating is the expensive part.” — Not necessarily
One of the biggest surprises for homeowners is how much prep can cost. A floor that looks clean can still need grinding, oil removal, crack repair, vacuuming, edge work, and more before coating. The biggest cost trap? Skipping something you won’t see once the epoxy is down, especially moisture testing or proper surface prep. Those are exactly what determine whether your floor lasts years or starts peeling sooner than expected.
My rule: don’t shop for epoxy based only on price per square foot. Ask what’s actually included in that square foot. Two contractors can quote very different prices for “epoxy flooring” because the prep, coating thickness, number of stages, and topcoat may be completely different.
When DIY Makes Sense (and When to Call a Pro in Thunder Bay)
Not every epoxy project needs a professional. If you have a clean, sound concrete slab with no oil stains, cracks, or moisture issues, nd you’re comfortable renting a grinder and following product instructions, a DIY kit can be a great weekend project. Thunder Bay’s climate does narrow your installation window, though. You need to work within the product’s temperature and humidity requirements, which can be tricky in our shoulder seasons.
But if your floor has any of the following, I’d strongly consider getting a professional assessment before buying materials:
- Visible oil or chemical contamination
- Multiple cracks, spalling, or surface damage
- Previous coatings that are peeling or flaking
- Any signs of moisture (dark spots, dampness, efflorescence)
- Uncertainty about concrete age, condition, or suitability
In Thunder Bay, trying to rush an epoxy install because the calendar says it “should” be done is a common mistake. Temperature and humidity affect cure times and adhesion. A pro can tell you if your slab is ready, what system fits your use case, and where you can realistically save money without compromising durability.
What to Ask Before You Hire (or Buy)
Whether you’re comparing DIY products or contractor quotes, ask these questions:
- What surface preparation is included? (Grinding? Etching? Crack repair? Oil removal?)
- Is moisture testing part of the process?
- What’s the solids content and film build of the epoxy?
- How many coats are included, and what’s the purpose of each?
- What topcoat is used, and is it rated for garage/vehicle traffic?
- What are the temperature and humidity requirements for application and cure?
- What’s the warranty, and what does it actually cover?
Two quotes might look similar on paper, but if one includes diamond grinding, moisture testing, and a high-solids topcoat while the other doesn’t, you’re not comparing the same thing.
Ready to See What Your Floor Actually Needs?
If you’re in Thunder Bay and considering an epoxy floor, contact me for a no-obligation quote and let me take a look at the condition of your concrete. I’ll explain what system I’d recommend, what preparation is required, and where you can realistically save money without compromising the finished floor. Even if you decide to DIY, I’d rather you understand what you’re getting into before spending hundreds or thousands on materials.
The goal isn’t to sell you the most expensive system. It’s to help you end up with a floor that lasts, whether you roll it on yourself or hire it out.